# 扩展插件 (Plugins)
EMQ X 消息服务器通过模块注册和钩子(Hooks)机制,支持用户开发扩展插件定制服务器认证鉴权与业务功能。
EMQ X 官方提供的插件包括:
| 插件 | 配置文件 | 说明 |
|---|---|---|
| emqx_dashboard (opens new window) + | etc/plugins/emqx_dashbord.conf | Web 控制台插件(默认加载) |
| emqx_management (opens new window) + | etc/plugins/emqx_management.conf | HTTP API 与 CLI 管理插件 |
| emqx_auth_clientid (opens new window) + | etc/plugins/emqx_auth_clientid.conf | ClientId 认证插件 |
| emqx_auth_username (opens new window) + | etc/plugins/emqx_auth_username.conf | 用户名、密码认证插件 |
| emqx_auth_jwt (opens new window) + | etc/plugins/emqx_auth_jwt.conf | JWT 认证/访问控制 |
| emqx_auth_ldap (opens new window) + | etc/plugins/emqx_auth_ldap.conf | LDAP 认证/访问控制 |
| emqx_auth_http (opens new window) + | etc/plugins/emqx_auth_http.conf | HTTP 认证/访问控制 |
| emqx_auth_mongo (opens new window) + | etc/plugins/emqx_auth_mongo.conf | MongoDB 认证/访问控制 |
| emqx_auth_mysql (opens new window) + | etc/plugins/emqx_auth_mysql.conf | MySQL 认证/访问控制 |
| emqx_auth_pgsql (opens new window) + | etc/plugins/emqx_auth_pgsql.conf | PostgreSQL 认证/访问控制 |
| emqx_auth_redis (opens new window) + | etc/plugins/emqx_auth_redis.conf | Redis 认证/访问控制 |
| emqx_psk_file (opens new window) + | etc/plugins/emqx_psk_file.conf | PSK 支持 |
| emqx_web_hook (opens new window) + | etc/plugins/emqx_web_hook.conf | Web Hook 插件 |
| emqx_lua_hook (opens new window) + | etc/plugins/emqx_lua_hook.conf | Lua Hook 插件 |
| emqx_retainer (opens new window) + | etc/plugins/emqx_retainer.conf | Retain 消息存储模块 |
| emqx_rule_engine (opens new window) + | etc/plugins/emqx_rule_engine.conf | 规则引擎 |
| emqx_bridge_mqtt (opens new window) + | etc/plugins/emqx_bridge_mqtt.conf | MQTT 消息桥接插件 |
| emqx_delayed_publish (opens new window) + | etc/plugins/emqx_delayed_publish.conf | 客户端延时发布消息支持 |
| emqx_coap (opens new window) + | etc/plugins/emqx_coap.conf | CoAP 协议支持 |
| emqx_lwm2m (opens new window) + | etc/plugins/emqx_lwm2m.conf | LwM2M 协议支持 |
| emqx_sn (opens new window) + | etc/plugins/emqx_sn.conf | MQTT-SN 协议支持 |
| emqx_stomp (opens new window) + | etc/plugins/emqx_stomp.conf | Stomp 协议支持 |
| emqx_recon (opens new window) + | etc/plugins/emqx_recon.conf | Recon 性能调试 |
| emqx_reloader (opens new window) + | etc/plugins/emqx_reloader.conf | Reloader 代码热加载插件 |
| emqx_plugin_template (opens new window) + | etc/plugins/emqx_plugin_template.conf | 插件开发模版 |
其中插件的加载有四种方式:
- 默认加载
- 命令行启停插件
- 使用 Dashboard 启停插件
- 调用管理 API 启停插件
开启默认加载
如需在系统启动时就默认启动某插件,则直接在 data/loaded_plugins 配置入需要启动的插件,例如默认开启的加载的插件有:
emqx_management.
emqx_rule_engine.
emqx_recon.
emqx_retainer.
emqx_dashboard.
命令行启停插件
在运行过程中,我们可以通过 CLI 命令的方式查看可用的插件列表、和启停某插件:
## 显示所有可用的插件列表
./bin/emqx_ctl plugins list

## 加载某插件
./bin/emqx_ctl plugins load emqx_auth_username

## 卸载某插件
./bin/emqx_ctl plugins unload emqx_auth_username

## 重新加载某插件
./bin/emqx_ctl plugins reload emqx_auth_username
使用 Dashboard 启停插件
如果 EMQ X 开启了 Dashbord 的插件(默认开启) 还可以直接通过访问 http://localhost:18083/plugins 中的插件管理页面启停、或者配置插件。
# Dashboard 插件
emqx_dashboard (opens new window) 是 EMQ X 消息服务器的 Web 管理控制台, 该插件默认开启。当 EMQ X 启动成功后,可访问 http://localhost:18083 进行查看,默认用户名/密码: admin/public。
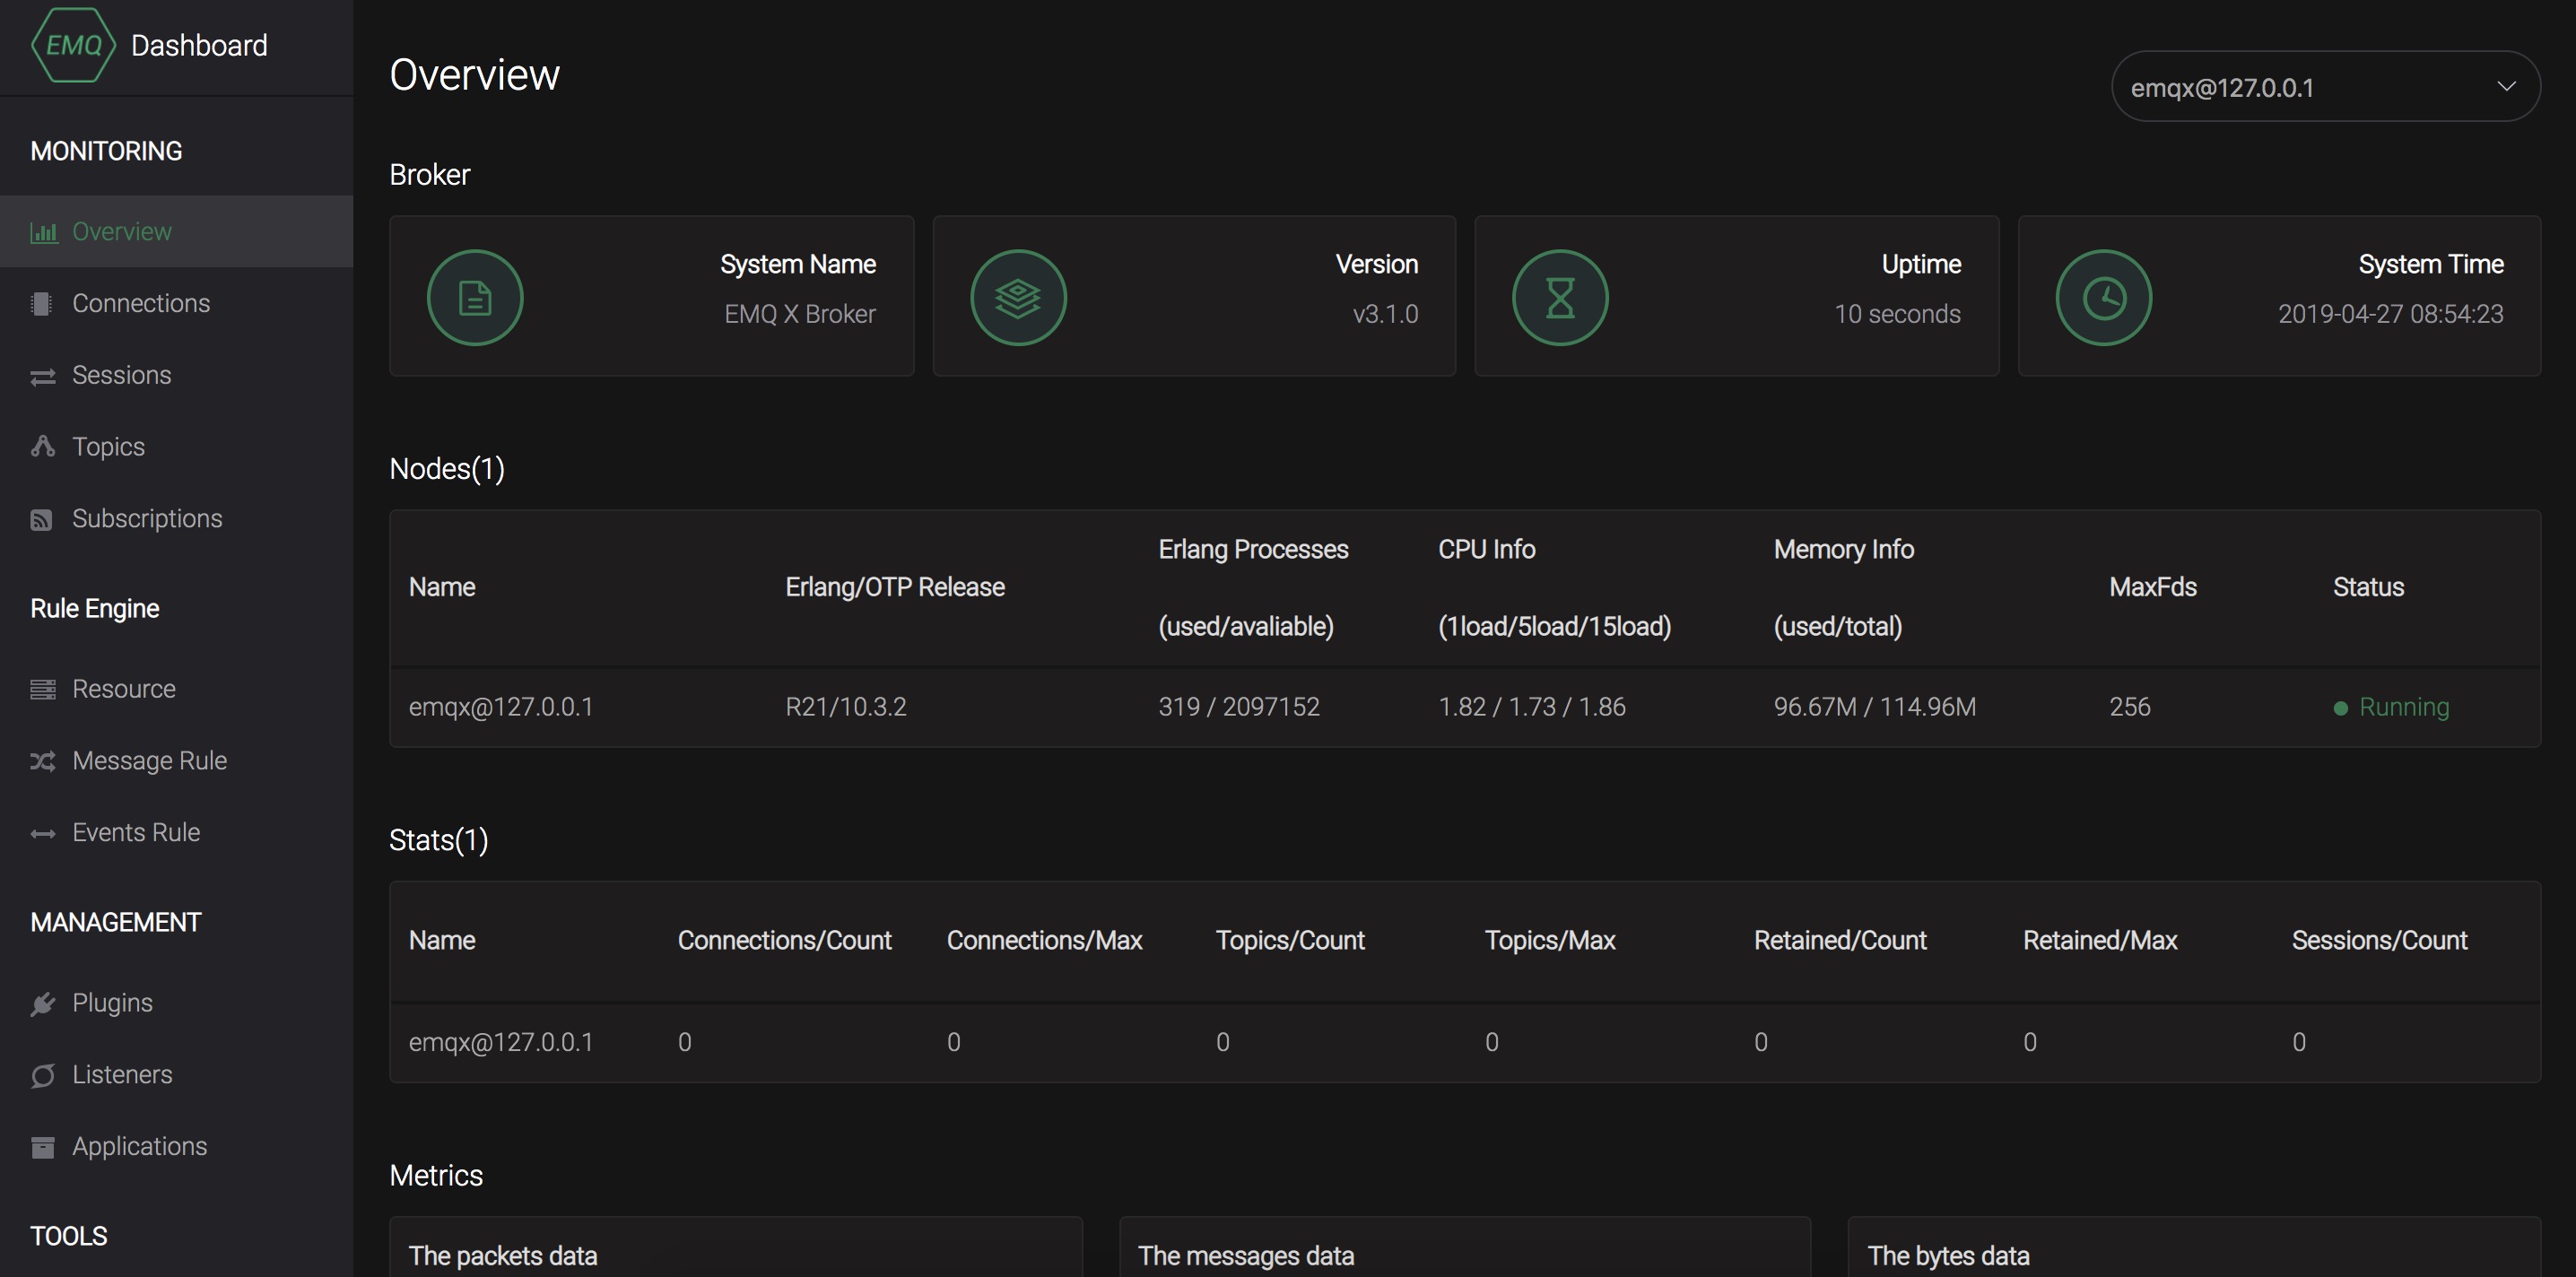
Dashboard 中可查询 EMQ X 消息服务器基本信息、统计数据、负载情况,查询当前客户端列表(Connections)、会话(Sessions)、路由表(Topics)、订阅关系(Subscriptions) 等详细信息。
除此之外,Dashboard 默认提供了一系列的 REST API 供前端调用。其详情可以参考 Dashboard -> HTTP API 部分。
# Dashboard 插件设置
etc/plugins/emqx_dashboard.conf:
## Dashboard 默认用户名/密码
dashboard.default_user.login = admin
dashboard.default_user.password = public

## Dashboard HTTP 服务端口配置
dashboard.listener.http = 18083
dashboard.listener.http.acceptors = 2
dashboard.listener.http.max_clients = 512

## Dashboard HTTPS 服务端口配置
## dashboard.listener.https = 18084
## dashboard.listener.https.acceptors = 2
## dashboard.listener.https.max_clients = 512
## dashboard.listener.https.handshake_timeout = 15s
## dashboard.listener.https.certfile = etc/certs/cert.pem
## dashboard.listener.https.keyfile = etc/certs/key.pem
## dashboard.listener.https.cacertfile = etc/certs/cacert.pem
## dashboard.listener.https.verify = verify_peer
## dashboard.listener.https.fail_if_no_peer_cert = true
# HTTP API 与 CLI 管理插件
emqx_management (opens new window) 是 EMQ X 消息服务器的 HTTP API 与 CLI 管理插件,该插件默认开启。当 EMQ X 启动成功后,用户即可通过该插件提供的 HTTP API 与 CLI 进行查询当前客户端列表等操作,详见 rest_api 与 commands 。
# HTTP API 与 CLI 管理设置
etc/plugins/emqx_management.conf:
## 最多返回多少条数据,用于分页机制
management.max_row_limit = 10000

## 默认的应用 secret
# management.application.default_secret = public

## Management HTTP 服务器端口配置
management.listener.http = 8080
management.listener.http.acceptors = 2
management.listener.http.max_clients = 512
management.listener.http.backlog = 512
management.listener.http.send_timeout = 15s
management.listener.http.send_timeout_close = on

## Management HTTPS 服务器端口配置
## management.listener.https = 8081
## management.listener.https.acceptors = 2
## management.listener.https.max_clients = 512
## management.listener.https.backlog = 512
## management.listener.https.send_timeout = 15s
## management.listener.https.send_timeout_close = on
## management.listener.https.certfile = etc/certs/cert.pem
## management.listener.https.keyfile = etc/certs/key.pem
## management.listener.https.cacertfile = etc/certs/cacert.pem
## management.listener.https.verify = verify_peer
## management.listener.https.fail_if_no_peer_cert = true
# ClientID 认证插件
emqx_auth_clientid (opens new window) 目前只支持 连接认证 ,通过 clientid 和 password 认证客户端。此插件在存储密码时会按照配置的 hash 算法将明文加密后存入。
# ClientID 认证配置
etc/plugins/emqx_auth_clientid.conf:
## Default usernames Examples
##auth.client.1.clientid = id
##auth.client.1.password = passwd
##auth.client.2.clientid = dev:devid
##auth.client.2.password = passwd2
##auth.client.3.clientid = app:appid
##auth.client.3.password = passwd3
##auth.client.4.clientid = client~!@#$%^&*()_+
##auth.client.4.password = passwd~!@#$%^&*()_+

## 密码加密方式
## 枚举值: plain | md5 | sha | sha256
auth.client.password_hash = sha256
# Username 认证插件
emqx_auth_username (opens new window) 目前只支持 连接认证 ,通过 username 和 password 认证客户端。此插件在存储密码时会按照配置的 hash 算法将明文加密后存入。
# 用户名认证配置
etc/plugins/emqx_auth_username.conf:
## Default usernames Examples:
##auth.user.1.username = admin
##auth.user.1.password = public
##auth.user.2.username = feng@emqtt.io
##auth.user.2.password = public
##auth.user.3.username = name~!@#$%^&*()_+
##auth.user.3.password = pwsswd~!@#$%^&*()_+

## 密码加密方式
## 枚举值: plain | md5 | sha | sha256
auth.user.password_hash = sha256
# JWT 认证插件
emqx_auth_jwt (opens new window) 支持基于 JWT (opens new window) 的方式,对连接的客户端进行认证,只支持 连接认证 功能。它会解析并校验 Token 的合理性和时效性、满足则允许连接。
# JWT 认证配置
etc/plugins/emqx_auth_jwt.conf:
## HMAC Hash 算法密钥
auth.jwt.secret = emqxsecret

## RSA 或 ECDSA 算法的公钥
## auth.jwt.pubkey = etc/certs/jwt_public_key.pem

## JWT 串的来源
## 枚举值: username | password
auth.jwt.from = password
# LDAP 认证/访问控制插件
emqx_auth_ldap (opens new window) 支持访问 LDAP (opens new window) 实现 连接认证 、* 访问控制 * 功能。
# LDAP 认证插件配置
etc/plugins/emqx_auth_ldap.conf:
auth.ldap.servers = 127.0.0.1

auth.ldap.port = 389

auth.ldap.pool = 8

auth.ldap.bind_dn = cn=root,dc=emqx,dc=io

auth.ldap.bind_password = public

auth.ldap.timeout = 30s

auth.ldap.device_dn = ou=device,dc=emqx,dc=io

auth.ldap.match_objectclass = mqttUser

auth.ldap.username.attributetype = uid

auth.ldap.password.attributetype = userPassword

auth.ldap.ssl = false

## auth.ldap.ssl.certfile = etc/certs/cert.pem

## auth.ldap.ssl.keyfile = etc/certs/key.pem

## auth.ldap.ssl.cacertfile = etc/certs/cacert.pem

## auth.ldap.ssl.verify = verify_peer

## auth.ldap.ssl.fail_if_no_peer_cert = true
# HTTP 认证/访问控制插件
emqx_auth_http (opens new window) 插件实现 连接认证 与 访问控制 的功能。它会将每个请求发送到指定的 HTTP 服务,通过其返回值来判断是否具有操作权限。
该插件总共支持三个请求分别为:
- auth.http.auth_req : 连接认证
- auth.http.super_req : 判断是否为超级用户
- auth.http.acl_req : 访问控制权限查询
每个请求的参数都支持使用真实的客户端的 Username, IP 地址等进行自定义。
提示
其中在 3.1 版本中新增的 %C %d 的支持。
# HTTP 认证插件配置
etc/plugins/emqx_auth_http.conf:
## http 请求超时时间, 0 为不设置超时
## auth.http.request.timeout = 0

## http 建立 tcp 连接的超时时间, 默认与 'request.timeout' 一致
## auth.http.request.connect_timout = 0

## http 请求最大重试次数
auth.http.request.retry_times = 3

## http 重试间隔
auth.http.request.retry_interval = 1s

## 重试间隔的退避指数, 实际值 = `interval * backoff ^ times`
auth.http.request.retry_backoff = 2.0

## https 证书配置
## auth.http.ssl.cacertfile = /certs/ca.pem
## auth.http.ssl.certfile = /certs/client-cert.pem
## auth.http.ssl.keyfile = /certs/client-key.pem

## 占位符:
##  - %u: username
##  - %c: clientid
##  - %a: ipaddress
##  - %P: password
##  - %C: common name of client TLS cert
##  - %d: subject of client TLS cert
auth.http.auth_req = http://127.0.0.1:8080/mqtt/auth

## AUTH 请求的 HTTP 方法和参数配置
auth.http.auth_req.method = post
auth.http.auth_req.params = clientid=%c,username=%u,password=%P

auth.http.super_req = http://127.0.0.1:8080/mqtt/superuser
auth.http.super_req.method = post
auth.http.super_req.params = clientid=%c,username=%u

## 占位符:
##  - %A: 1 | 2, 1 = sub, 2 = pub
##  - %u: username
##  - %c: clientid
##  - %a: ipaddress
##  - %t: topic
auth.http.acl_req = http://127.0.0.1:8080/mqtt/acl
auth.http.acl_req.method = get
auth.http.acl_req.params = access=%A,username=%u,clientid=%c,ipaddr=%a,topic=%t
# HTTP API 返回值处理
连接认证 :
## 认证成功
HTTP Status Code: 200

## 忽略此次认证
HTTP Status Code: 200
Body: ignore

## 认证失败
HTTP Status Code: Except 200
超级用户 :
## 确认为超级用户
HTTP Status Code: 200

## 非超级用户
HTTP Status Code: Except 200
访问控制 :
## 允许 Publish/Subscribe:
HTTP Status Code: 200

## 忽略此次鉴权:
HTTP Status Code: 200
Body: ignore

## 拒绝该次 Publish/Subscribe:
HTTP Status Code: Except 200
# MySQL 认证/访问控制插件
emqx_auth_mysql (opens new window) 支持访问 MySQL 实现 连接认证 、* 访问控制 * 功能。要实现这些功能,我们需要在 MySQL 中创建两张表,其格式如下:
# MQTT 用户表
CREATE TABLE `mqtt_user` (
  `id` int(11) unsigned NOT NULL AUTO_INCREMENT,
  `username` varchar(100) DEFAULT NULL,
  `password` varchar(100) DEFAULT NULL,
  `salt` varchar(35) DEFAULT NULL,
  `is_superuser` tinyint(1) DEFAULT 0,
  `created` datetime DEFAULT NULL,
  PRIMARY KEY (`id`),
  UNIQUE KEY `mqtt_username` (`username`)
) ENGINE=MyISAM DEFAULT CHARSET=utf8;
提示
插件同样支持使用自定义结构的表,通过 auth_query 配置查询语句即可。
# MQTT 访问控制表
CREATE TABLE `mqtt_acl` (
  `id` int(11) unsigned NOT NULL AUTO_INCREMENT,
  `allow` int(1) DEFAULT NULL COMMENT '0: deny, 1: allow',
  `ipaddr` varchar(60) DEFAULT NULL COMMENT 'IpAddress',
  `username` varchar(100) DEFAULT NULL COMMENT 'Username',
  `clientid` varchar(100) DEFAULT NULL COMMENT 'ClientId',
  `access` int(2) NOT NULL COMMENT '1: subscribe, 2: publish, 3: pubsub',
  `topic` varchar(100) NOT NULL DEFAULT '' COMMENT 'Topic Filter',
  PRIMARY KEY (`id`)
) ENGINE=InnoDB DEFAULT CHARSET=utf8;

INSERT INTO `mqtt_acl` (`id`, `allow`, `ipaddr`, `username`, `clientid`, `access`, `topic`)
VALUES
    (1,1,NULL,'$all',NULL,2,'#'),
    (2,0,NULL,'$all',NULL,1,'$SYS/#'),
    (3,0,NULL,'$all',NULL,1,'eq #'),
    (5,1,'127.0.0.1',NULL,NULL,2,'$SYS/#'),
    (6,1,'127.0.0.1',NULL,NULL,2,'#'),
    (7,1,NULL,'dashboard',NULL,1,'$SYS/#');
# 配置 MySQL 认证鉴权插件
etc/plugins/emqx_auth_mysql.conf:
## Mysql 服务器地址
auth.mysql.server = 127.0.0.1:3306

## Mysql 连接池大小
auth.mysql.pool = 8

## Mysql 连接用户名
## auth.mysql.username =

## Mysql 连接密码
## auth.mysql.password =

## Mysql 认证用户表名
auth.mysql.database = mqtt

## Mysql 查询超时时间
auth.mysql.query_timeout = 5s

## 可用占位符:
##  - %u: username
##  - %c: clientid
##  - %C: common name of client TLS cert
##  - %d: subject of client TLS cert
## 注: 该条 SQL 必须且仅需查询 `password` 字段
auth.mysql.auth_query = select password from mqtt_user where username = '%u' limit 1

## 密码加密方式: plain, md5, sha, sha256, pbkdf2
auth.mysql.password_hash = sha256

## 超级用户查询语句
auth.mysql.super_query = select is_superuser from mqtt_user where username = '%u' limit 1

## ACL 查询语句
## 注: 可以增加 'ORDER BY' 子句以控制 ACL 规则的生效顺序
auth.mysql.acl_query = select allow, ipaddr, username, clientid, access, topic from mqtt_acl where ipaddr = '%a' or username = '%u' or username = '$all' or clientid = '%c'
此外,为防止密码域过于简单而带来安全的隐患问题,该插件还支持密码加盐操作:
## 加盐密文格式
## auth.mysql.password_hash = salt,sha256
## auth.mysql.password_hash = salt,bcrypt
## auth.mysql.password_hash = sha256,salt

## pbkdf2 带 macfun 格式
## macfun: md4, md5, ripemd160, sha, sha224, sha256, sha384, sha512
## auth.mysql.password_hash = pbkdf2,sha256,1000,20
提示
3.1 版本新增 %C %d 支持。
# Postgres 认证插件
emqx_auth_pgsql (opens new window) 通过访问 Postgres 实现 连接认证 、* 访问控制 * 功能。同样需要定义两张表如下:
# Postgres MQTT 用户表
CREATE TABLE mqtt_user (
  id SERIAL primary key,
  is_superuser boolean,
  username character varying(100),
  password character varying(100),
  salt character varying(40)
);
# Postgres MQTT 访问控制表
CREATE TABLE mqtt_acl (
  id SERIAL primary key,
  allow integer,
  ipaddr character varying(60),
  username character varying(100),
  clientid character varying(100),
  access  integer,
  topic character varying(100)
);

INSERT INTO mqtt_acl (id, allow, ipaddr, username, clientid, access, topic)
VALUES
    (1,1,NULL,'$all',NULL,2,'#'),
    (2,0,NULL,'$all',NULL,1,'$SYS/#'),
    (3,0,NULL,'$all',NULL,1,'eq #'),
    (5,1,'127.0.0.1',NULL,NULL,2,'$SYS/#'),
    (6,1,'127.0.0.1',NULL,NULL,2,'#'),
    (7,1,NULL,'dashboard',NULL,1,'$SYS/#');
# 配置 Postgres 认证鉴权插件
etc/plugins/emqx_auth_pgsql.conf:
## PostgreSQL 服务地址
auth.pgsql.server = 127.0.0.1:5432

## PostgreSQL 连接池大小
auth.pgsql.pool = 8

auth.pgsql.username = root

## auth.pgsql.password =

auth.pgsql.database = mqtt

auth.pgsql.encoding = utf8

## 连接认证查询 SQL
## 占位符:
##  - %u: username
##  - %c: clientid
##  - %C: common name of client TLS cert
##  - %d: subject of client TLS cert
auth.pgsql.auth_query = select password from mqtt_user where username = '%u' limit 1

## 加密方式: plain | md5 | sha | sha256 | bcrypt
auth.pgsql.password_hash = sha256

## 超级用户查询语句 (占位符与认证一致)
auth.pgsql.super_query = select is_superuser from mqtt_user where username = '%u' limit 1

## ACL 查询语句
##
## 占位符:
##  - %a: ipaddress
##  - %u: username
##  - %c: clientid
## 注: 可以增加 'ORDER BY' 子句以控制 ACL 规则的生效顺序
auth.pgsql.acl_query = select allow, ipaddr, username, clientid, access, topic from mqtt_acl where ipaddr = '%a' or username = '%u' or username = '$all' or clientid = '%c'
同样的 password_hash 可以配置为更为安全的模式:
## 加盐加密格式
## auth.pgsql.password_hash = salt,sha256
## auth.pgsql.password_hash = sha256,salt
## auth.pgsql.password_hash = salt,bcrypt

## pbkdf2 macfun 格式
## macfun: md4, md5, ripemd160, sha, sha224, sha256, sha384, sha512
## auth.pgsql.password_hash = pbkdf2,sha256,1000,20
开启以下配置,则可支持 TLS 连接到 Postgres:
## 是否开启 SSL
auth.pgsql.ssl = false

## 证书配置
## auth.pgsql.ssl_opts.keyfile =
## auth.pgsql.ssl_opts.certfile =
## auth.pgsql.ssl_opts.cacertfile =
提示
3.1 版本新增 %C %d 支持。
# Redis 认证/访问控制插件
emqx_auth_redis (opens new window) 通过访问 Redis 数据以实现 连接认证 和 访问控制 的功能。
# 配置 Redis 认证插件
etc/plugins/emqx_auth_redis.conf:
## Redis 服务集群类型
## 枚举值: single | sentinel | cluster
auth.redis.type = single

## Redis 服务器地址
##
## Single Redis Server: 127.0.0.1:6379, localhost:6379
## Redis Sentinel: 127.0.0.1:26379,127.0.0.2:26379,127.0.0.3:26379
## Redis Cluster: 127.0.0.1:6379,127.0.0.2:6379,127.0.0.3:6379
auth.redis.server = 127.0.0.1:6379

## Redis sentinel 名称
## auth.redis.sentinel = mymaster

## Redis 连接池大小
auth.redis.pool = 8

## Redis database 序号
auth.redis.database = 0

## Redis password.
## auth.redis.password =

## Redis 查询超时时间
auth.redis.query_timeout = 5s

## 认证查询指令
## 占位符:
##  - %u: username
##  - %c: clientid
##  - %C: common name of client TLS cert
##  - %d: subject of client TLS cert
auth.redis.auth_cmd = HMGET mqtt_user:%u password

## 密码加密方式.
## 枚举: plain | md5 | sha | sha256 | bcrypt
auth.redis.password_hash = plain

## 超级用户查询指令 (占位符与认证一致)
auth.redis.super_cmd = HGET mqtt_user:%u is_superuser

## ACL 查询指令
## 占位符:
##  - %u: username
##  - %c: clientid
auth.redis.acl_cmd = HGETALL mqtt_acl:%u
同样,该插件支持更安全的密码格式:
## 加盐密文格式
## auth.redis.password_hash = salt,sha256
## auth.redis.password_hash = sha256,salt
## auth.redis.password_hash = salt,bcrypt

## pbkdf2 macfun 格式
## macfun: md4, md5, ripemd160, sha, sha224, sha256, sha384, sha512
## auth.redis.password_hash = pbkdf2,sha256,1000,20
提示
3.1 版本新增 %C %d 支持。
# Redis 用户 Hash
默认基于用户 Hash 认证:
HSET mqtt_user:\<username> is_superuser 1
HSET mqtt_user:\<username> password "passwd"
HSET mqtt_user:\<username> salt "salt"
# Redis ACL 规则 Hash
默认采用 Hash 存储 ACL 规则:
HSET mqtt_acl:\<username> topic1 1
HSET mqtt_acl:\<username> topic2 2
HSET mqtt_acl:\<username> topic3 3
提示
1: subscribe, 2: publish, 3: pubsub
# MongoDB 认证/访问控制插件
emqx_auth_mongo (opens new window) 通过访问 MongoDB 实现 连接认证 和 访问控制 功能。
# 配置 MongoDB 认证插件
etc/plugins/emqx_auth_mongo.conf:
## MongoDB 拓扑类型
## 枚举: single | unknown | sharded | rs
auth.mongo.type = single

## rs 模式下的 `set name`
## auth.mongo.rs_set_name =

## MongoDB 服务地址
auth.mongo.server = 127.0.0.1:27017

## MongoDB 连接池大小
auth.mongo.pool = 8

## 连接认证信息
## auth.mongo.login =
## auth.mongo.password =
## auth.mongo.auth_source = admin

## 认证数据表名
auth.mongo.database = mqtt

## 查询超时时间
auth.mongo.query_timeout = 5s

## 认证查询配置
auth.mongo.auth_query.collection = mqtt_user
auth.mongo.auth_query.password_field = password
auth.mongo.auth_query.password_hash = sha256

## 连接认证查询字段列表
## 占位符:
##  - %u: username
##  - %c: clientid
##  - %C: common name of client TLS cert
##  - %d: subject of client TLS cert
auth.mongo.auth_query.selector = username=%u

## 超级用户查询
auth.mongo.super_query = on
auth.mongo.super_query.collection = mqtt_user
auth.mongo.super_query.super_field = is_superuser
auth.mongo.super_query.selector = username=%u

## ACL 查询配置
auth.mongo.acl_query = on
auth.mongo.acl_query.collection = mqtt_acl

auth.mongo.acl_query.selector = username=%u
提示
3.1 版本新增 %C %d 支持。
# MongoDB 数据库
use mqtt
db.createCollection("mqtt_user")
db.createCollection("mqtt_acl")
db.mqtt_user.ensureIndex({"username":1})
提示
数据库、集合名称可自定义。
# MongoDB 用户集合
{
    username: "user",
    password: "password hash",
    is_superuser: boolean (true, false),
    created: "datetime"
}
示例:
db.mqtt_user.insert({username: "test", password: "password hash", is_superuser: false})
db.mqtt_user:insert({username: "root", is_superuser: true})
# MongoDB ACL 集合
{
    username: "username",
    clientid: "clientid",
    publish: ["topic1", "topic2", ...],
    subscribe: ["subtop1", "subtop2", ...],
    pubsub: ["topic/#", "topic1", ...]
}
示例:
db.mqtt_acl.insert({username: "test", publish: ["t/1", "t/2"], subscribe: ["user/%u", "client/%c"]})
db.mqtt_acl.insert({username: "admin", pubsub: ["#"]})
# PSK 认证插件
emqx_psk_file (opens new window) 插件主要提供了 PSK 支持。其目的是用于在客户端建立 TLS/DTLS 连接时,通过 PSK 方式实现 连接认证 的功能。
# 配置 PSK 认证插件
etc/plugins/emqx_psk_file.conf:
psk.file.path = etc/psk.txt
# WebHook 插件
emqx_web_hook (opens new window) 插件可以将所有 EMQ X 的事件及消息都发送到指定的 HTTP 服务器。
# 配置 WebHook 插件
etc/plugins/emqx_web_hook.conf:
## 回调的 Web Server 地址
web.hook.api.url = http://127.0.0.1:8080

## 编码 Payload 字段
## 枚举值: undefined | base64 | base62
## 默认值: undefined (不进行编码)
## web.hook.encode_payload = base64

## 消息、事件配置
web.hook.rule.client.connected.1     = {"action": "on_client_connected"}
web.hook.rule.client.disconnected.1  = {"action": "on_client_disconnected"}
web.hook.rule.client.subscribe.1     = {"action": "on_client_subscribe"}
web.hook.rule.client.unsubscribe.1   = {"action": "on_client_unsubscribe"}
web.hook.rule.session.created.1      = {"action": "on_session_created"}
web.hook.rule.session.subscribed.1   = {"action": "on_session_subscribed"}
web.hook.rule.session.unsubscribed.1 = {"action": "on_session_unsubscribed"}
web.hook.rule.session.terminated.1   = {"action": "on_session_terminated"}
web.hook.rule.message.publish.1      = {"action": "on_message_publish"}
web.hook.rule.message.deliver.1      = {"action": "on_message_deliver"}
web.hook.rule.message.acked.1        = {"action": "on_message_acked"}
# Lua 插件
emqx_lua_hook (opens new window) 插件将所有的事件和消息都发送到指定的 Lua 函数上。其具体使用参见其 README。
# Retainer 插件
emqx_retainer (opens new window) 该插件设置为默认启动,为 EMQ X 提供 Retained 类型的消息支持。它会将所有主题的 Retained 消息存储在集群的数据库中,并待有客户端订阅该主题的时候将该消息投递出去。
# 配置 Retainer 插件
etc/plugins/emqx_retainer.conf:
## retained 消息存储方式
##  - ram: 仅内存
##  - disc: 内存和磁盘
##  - disc_only: 仅磁盘
retainer.storage_type = ram

## 最大存储数 (0表示未限制)
retainer.max_retained_messages = 0

## 单条最大可存储消息大小
retainer.max_payload_size = 1MB

## 过期时间, 0 表示永不过期
## 单位: h 小时; m 分钟; s 秒。如 60m 表示 60 分钟
retainer.expiry_interval = 0
# MQTT 消息桥接插件
桥接 的概念是 EMQ X 支持将自身某类主题的消息通过某种方式转发到另一个 MQTT Broker。
桥接 与 集群 的不同在于:桥接不会复制主题树与路由表,只根据桥接规则转发 MQTT 消息。
目前 MQTT 消息插件支持的桥接方式有:
- RPC 桥接:RPC 桥接只能在 EMQ X Broker 间使用,且不支持订阅远程节点的主题去同步数据
- MQTT 桥接:MQTT 桥接同时支持转发和通过订阅主题来实现数据同步两种方式
在 EMQ X 中,通过修改 etc/plugins/emqx_bridge_mqtt.conf 来配置 bridge。EMQ X 根据不同的 name 来区分不同的 bridge。例如:
## 桥接地址: 使用节点名(nodename@host)则用于 RPC 桥接,使用 host:port 用于 MQTT 连接
bridge.mqtt.aws.address = 127.0.0.1:1883
该项配置声明了一个名为 aws 的 bridge 并指定以 MQTT 的方式桥接到 127.0.0.1:1883 这台 MQTT 服务器
在需要创建多个 bridge 时,可以先复制其全部的配置项,在通过使用不同的 name 来标示(比如 bridge.mqtt.$name.address 其中 $name 指代的为 bridge 的名称)
# 配置 MQTT 消息桥接插件
etc/plugins/emqx_bridge_mqtt.conf
## 桥接地址: 使用节点名(nodename@host)则用于 RPC 桥接,使用 host:port 用于 MQTT 连接
bridge.mqtt.aws.address = 192.168.1.2:1883

## 桥接的协议版本
## 枚举值: mqttv3 | mqttv4 | mqttv5
bridge.mqtt.aws.proto_ver = mqttv4

## 客户端的 client_id
bridge.mqtt.aws.client_id = bridge_emq

## 客户端的 clean_start 字段
## 注: 有些 MQTT Broker 需要将 clean_start 值设成 `true`
bridge.mqtt.aws.clean_start = true

## 客户端的 username 字段
bridge.mqtt.aws.username = user

## 客户端的 password 字段
bridge.mqtt.aws.password = passwd

## 客户端是否使用 ssl 来连接远程服务器
bridge.mqtt.aws.ssl = off

## 客户端 SSL 连接的 CA 证书 (PEM格式)
bridge.mqtt.aws.cacertfile = etc/certs/cacert.pem

## 客户端 SSL 连接的 SSL 证书
bridge.mqtt.aws.certfile = etc/certs/client-cert.pem

## 客户端 SSL 连接的密钥文件
bridge.mqtt.aws.keyfile = etc/certs/client-key.pem

## SSL 加密方式
bridge.mqtt.aws.ciphers = ECDHE-ECDSA-AES256-GCM-SHA384,ECDHE-RSA-AES256-GCM-SHA384

## TLS PSK 的加密套件
## 注意 'listener.ssl.external.ciphers' 和 'listener.ssl.external.psk_ciphers' 不能同时配置
##
## See 'https://tools.ietf.org/html/rfc4279#section-2'.
## bridge.mqtt.aws.psk_ciphers = PSK-AES128-CBC-SHA,PSK-AES256-CBC-SHA,PSK-3DES-EDE-CBC-SHA,PSK-RC4-SHA

## 客户端的心跳间隔
bridge.mqtt.aws.keepalive = 60s

## 支持的 TLS 版本
bridge.mqtt.aws.tls_versions = tlsv1.2,tlsv1.1,tlsv1

## 需要被转发的消息的主题
bridge.mqtt.aws.forwards = sensor1/#,sensor2/#

## 挂载点(mountpoint)
bridge.mqtt.aws.mountpoint = bridge/emqx2/${node}/

## 订阅对端的主题
bridge.mqtt.aws.subscription.1.topic = cmd/topic1

## 订阅对端主题的 QoS
bridge.mqtt.aws.subscription.1.qos = 1

## 桥接的重连间隔
## 默认: 30秒
bridge.mqtt.aws.reconnect_interval = 30s

## QoS1/QoS2 消息的重传间隔
bridge.mqtt.aws.retry_interval = 20s

## Inflight 大小.
bridge.mqtt.aws.max_inflight_batches = 32

## emqx_bridge 内部用于 batch 的消息数量
bridge.mqtt.aws.queue.batch_count_limit = 32

## emqx_bridge 内部用于 batch 的消息字节数
bridge.mqtt.aws.queue.batch_bytes_limit = 1000MB

## 放置 replayq 队列的路径,如果没有在配置中指定该项,那么 replayq
## 将会以 `mem-only` 的模式运行,消息不会缓存到磁盘上。
bridge.mqtt.aws.queue.replayq_dir = data/emqx_aws_bridge/

## Replayq 数据段大小
bridge.mqtt.aws.queue.replayq_seg_bytes = 10MB
# Delayed Publish 插件
emqx_delayed_publish (opens new window) 提供了延迟发送消息的功能。当客户端使用特殊主题前缀 $delayed/\<seconds>/ 发布消息到 EMQ X 时,EMQ X 将在 \<seconds> 秒后发布该主题消息。
# CoAP 协议插件
emqx_coap (opens new window) 提供对 CoAP 协议(RFC 7252)的支持。
# 配置 CoAP 协议插件
etc/plugins/emqx_coap.conf:
coap.port = 5683

coap.keepalive = 120s

coap.enable_stats = off
若开启以下配置,则可以支持 DTLS:
## DTLS 监听端口
coap.dtls.port = 5684

coap.dtls.keyfile = /certs/key.pem

coap.dtls.certfile = /certs/cert.pem

## 双向认证相关
## coap.dtls.verify = verify_peer
## coap.dtls.cacertfile = /certs/cacert.pem
## coap.dtls.fail_if_no_peer_cert = false
# 测试 CoAP 插件
我们可以通过安装 libcoap (opens new window) 来测试 EMQ X 对 CoAP 协议的支持情况。
yum install libcoap

% coap client publish message
coap-client -m put -e "qos=0&retain=0&message=payload&topic=hello" coap://localhost/mqtt
# LwM2M 协议插件
emqx_lwm2m (opens new window) 提供对 LwM2M 协议的支持。
# 配置 LwM2M 插件
etc/plugins/emqx_lwm2m.conf:
## LwM2M 监听端口
lwm2m.port = 5683

## Lifetime 限制
lwm2m.lifetime_min = 1s
lwm2m.lifetime_max = 86400s

## Q Mode 模式下 `time window` 长度, 单位秒。
## 超过该 window 的消息都将被缓存
#lwm2m.qmode_time_window = 22

## LwM2M 是否部署在 coaproxy 后
#lwm2m.lb = coaproxy

## 设备上线后,主动 observe 所有的 objects
#lwm2m.auto_observe = off

# 主题挂载点
# Placeholders supported:
#    '%e': Endpoint Name
#    '%a': IP Address
lwm2m.mountpoint = lwm2m/%e/

## client register 成功后主动向 EMQ X 订阅的主题
## 占位符:
##    '%e': Endpoint Name
##    '%a': IP Address
lwm2m.topics.command = dn/#

## client 应答消息(response) 到 EMQ X 的主题
lwm2m.topics.response = up/resp

## client 通知类消息(noify message) 到 EMQ X 的主题
lwm2m.topics.notify = up/notify

## client 注册类消息(register message) 到 EMQ X 的主题
lwm2m.topics.register = up/resp

# client 更新类消息(update message) 到 EMQ X 的主题
lwm2m.topics.update = %e/up/resp

# Object 定义的 xml 文件位置
lwm2m.xml_dir =  etc/lwm2m_xml
同样可以通过以下配置打开 DTLS 支持:
# DTLS 证书配置
lwm2m.certfile = etc/certs/cert.pem
lwm2m.keyfile = etc/certs/key.pem
# MQTT-SN 协议插件
emqx_sn (opens new window) 插件提供对 MQTT-SN (opens new window) 协议的支持。
# 配置 MQTT-SN 协议插件
etc/plugins/emqx_sn.conf:
mqtt.sn.port = 1884
# Stomp 协议插件
emqx_stomp (opens new window) 提供对 Stomp 协议的支持。支持客户端通过 Stomp 1.0/1.1/1.2 协议连接 EMQ X,发布订阅 MQTT 消息。
# 配置 Stomp 插件
提示
Stomp 协议端口: 61613
etc/plugins/emqx_stomp.conf:
stomp.default_user.login = guest

stomp.default_user.passcode = guest

stomp.allow_anonymous = true

stomp.frame.max_headers = 10

stomp.frame.max_header_length = 1024

stomp.frame.max_body_length = 8192

stomp.listener = 61613

stomp.listener.acceptors = 4

stomp.listener.max_clients = 512
# Recon 性能调试插件
emqx_recon (opens new window) 插件集成了 recon 性能调测库,可用于查看当前系统的一些状态信息,例如:
./bin/emqx_ctl recon

recon memory                 #recon_alloc:memory/2
recon allocated              #recon_alloc:memory(allocated_types, current|max)
recon bin_leak               #recon:bin_leak(100)
recon node_stats             #recon:node_stats(10, 1000)
recon remote_load Mod        #recon:remote_load(Mod)
# 配置 Recon 插件
etc/plugins/emqx_recon.conf:
%% Garbage Collection: 10 minutes
recon.gc_interval = 600
# Reloader 热加载插件
emqx_reloader (opens new window) 用于开发调试的代码热升级插件。加载该插件后 EMQ X 会根据配置的时间间隔自动热升级更新代码。
同时,也提供了 CLI 命令来指定 reload 某一个模块:
./bin/emqx_ctl reload \<Module>
提示
产品部署环境不建议使用该插件。
# 配置 Reloader 插件
etc/plugins/emqx_reloader.conf:
reloader.interval = 60

reloader.logfile = log/reloader.log
# 插件开发模版
emqx_plugin_template (opens new window) 是一个 EMQ X 插件模板,在功能上并无任何意义。
开发者需要自定义插件时,可以查看该插件的代码和结构,以更快地开发一个标准的 EMQ X 插件。插件实际是一个普通的 Erlang Application ,其配置文件为: etc/${PluginName}.config 。
# EMQ X R3.2 插件开发
# 创建插件项目
参考 emqx_plugin_template (opens new window) 插件模版创建新的插件项目。
提示
在 \<plugin name>_app.erl 文件中必须加上标签 -emqx_plugin(?MODULE). 以表明这是一个 EMQ X 的插件。
# 创建认证/访问控制模块
认证演示模块 - emqx_auth_demo.erl
-module(emqx_auth_demo).

-export([ init/1
        , check/2
        , description/0
        ]).

init(Opts) -> {ok, Opts}.

check(_Credentials = #{client_id := ClientId, username := Username, password := Password}, _State) ->
    io:format("Auth Demo: clientId=~p, username=~p, password=~p~n", [ClientId, Username, Password]),
    ok.

description() -> "Auth Demo Module".
访问控制演示模块 - emqx_acl_demo.erl
-module(emqx_acl_demo).

-include_lib("emqx/include/emqx.hrl").

%% ACL callbacks
-export([ init/1
        , check_acl/5
        , reload_acl/1
        , description/0
        ]).

init(Opts) ->
    {ok, Opts}.

check_acl({Credentials, PubSub, _NoMatchAction, Topic}, _State) ->
    io:format("ACL Demo: ~p ~p ~p~n", [Credentials, PubSub, Topic]),
    allow.

reload_acl(_State) ->
    ok.

description() -> "ACL Demo Module".
注册认证、访问控制模块 - emqx_plugin_template_app.erl
ok = emqx:hook('client.authenticate', fun emqx_auth_demo:check/2, []),
ok = emqx:hook('client.check_acl', fun emqx_acl_demo:check_acl/5, []).
# 注册钩子(Hooks)
通过钩子(Hook)处理客户端上下线、主题订阅、消息收发。
emqx_plugin_template.erl:
%% Called when the plugin application start
load(Env) ->
    emqx:hook('client.authenticate', fun ?MODULE:on_client_authenticate/2, [Env]),
    emqx:hook('client.check_acl', fun ?MODULE:on_client_check_acl/5, [Env]),
    emqx:hook('client.connected', fun ?MODULE:on_client_connected/4, [Env]),
    emqx:hook('client.disconnected', fun ?MODULE:on_client_disconnected/3, [Env]),
    emqx:hook('client.subscribe', fun ?MODULE:on_client_subscribe/3, [Env]),
    emqx:hook('client.unsubscribe', fun ?MODULE:on_client_unsubscribe/3, [Env]),
    emqx:hook('session.created', fun ?MODULE:on_session_created/3, [Env]),
    emqx:hook('session.resumed', fun ?MODULE:on_session_resumed/3, [Env]),
    emqx:hook('session.subscribed', fun ?MODULE:on_session_subscribed/4, [Env]),
    emqx:hook('session.unsubscribed', fun ?MODULE:on_session_unsubscribed/4, [Env]),
    emqx:hook('session.terminated', fun ?MODULE:on_session_terminated/3, [Env]),
    emqx:hook('message.publish', fun ?MODULE:on_message_publish/2, [Env]),
    emqx:hook('message.deliver', fun ?MODULE:on_message_deliver/3, [Env]),
    emqx:hook('message.acked', fun ?MODULE:on_message_acked/3, [Env]),
    emqx:hook('message.dropped', fun ?MODULE:on_message_dropped/3, [Env]).
所有可用钩子(Hook)说明:
| 钩子 | 说明 |
|---|---|
| client.authenticate | 连接认证 |
| client.check_acl | ACL 校验 |
| client.connected | 客户端上线 |
| client.disconnected | 客户端连接断开 |
| client.subscribe | 客户端订阅主题 |
| client.unsubscribe | 客户端取消订阅主题 |
| session.created | 会话创建 |
| session.resumed | 会话恢复 |
| session.subscribed | 会话订阅主题后 |
| session.unsubscribed | 会话取消订阅主题后 |
| session.terminated | 会话终止 |
| message.publish | MQTT 消息发布 |
| message.deliver | MQTT 消息进行投递 |
| message.acked | MQTT 消息回执 |
| message.dropped | MQTT 消息丢弃 |
# 注册 CLI 命令
扩展命令行演示模块 - emqx_cli_demo.erl
-module(emqx_cli_demo).

-export([cmd/1]).

cmd(["arg1", "arg2"]) ->
    emqx_cli:print("ok");

cmd(_) ->
    emqx_cli:usage([{"cmd arg1 arg2", "cmd demo"}]).
注册命令行模块 - emqx_plugin_template_app.erl
ok = emqx_ctl:register_command(cmd, {emqx_cli_demo, cmd}, []),
插件加载后, ./bin/emqx_ctl 新增命令行:
./bin/emqx_ctl cmd arg1 arg2
# 插件配置文件
插件自带配置文件放置在 etc/${plugin_name}.conf|config 。EMQ X 支持两种插件配置格式:
Erlang 原生配置文件格式 -
${plugin_name}.config:[ {plugin_name, [ {key, value} ]} ].sysctl 的
k = v通用格式 -${plugin_name}.conf:plugin_name.key = value
提示
k = v 格式配置需要插件开发者创建 priv/plugin_name.schema 映射文件。
# 编译发布插件
clone emqx-rel 项目:
git clone https://github.com/emqx/emqx-rel.gitrebar.config 添加依赖:
{deps,
   [ {plugin_name, {git, "url_of_plugin", {tag, "tag_of_plugin"}}}
   , ....
   ....
   ]
}
rebar.config 中 relx 段落添加:
{relx,
    [...
    , ...
    , {release, {emqx, git_describe},
       [
         {plugin_name, load},
       ]
      }
    ]
}
- Dashboard 插件
- HTTP API 与 CLI 管理插件
- ClientID 认证插件
- Username 认证插件
- JWT 认证插件
- LDAP 认证/访问控制插件
- HTTP 认证/访问控制插件
- MySQL 认证/访问控制插件
- Postgres 认证插件
- Redis 认证/访问控制插件
- MongoDB 认证/访问控制插件
- PSK 认证插件
- WebHook 插件
- Lua 插件
- Retainer 插件
- MQTT 消息桥接插件
- Delayed Publish 插件
- CoAP 协议插件
- LwM2M 协议插件
- MQTT-SN 协议插件
- Stomp 协议插件
- Recon 性能调试插件
- Reloader 热加载插件
- 插件开发模版
- EMQ X R3.2 插件开发